Have you ever wondered how Angular knows when to re-render a component? Or how it knows when data has been updated?
The short answer is: through a process called Change Detection. But if you want to dive deeper, there’s much more to discover. In this article, I’ll try to simplify this concept so that you can better understand how it works.
Do we really need to know everything about Change Detection?
In most cases, we can comfortably say that Change Detection works as it is, and there’s nothing more to know. Yet, it’s still useful to understand how it works; here are some benefits:
- Improve performance by avoiding unnecessary checks and reducing the app’s workload.
- Identify DOM update bugs more easily by understanding when and how changes to the state propagate.
- Understand how to temporarily disable Change Detection to prevent external libraries from triggering it needlessly.
What is Change Detection, and what problem does it solve?
Change Detection is a mechanism Angular uses to keep the DOM (the user interface) and the model (the app’s data) synchronized. Every time data changes, Angular ensures that these changes are reflected in the HTML template without requiring manual intervention.
Imagine we have an app that shows a product list. When a user adds a product to the cart, Angular automatically updates the view. But how does it do that?
Zone.js
Here’s where Zone.js comes in. This library is available by default in every Angular application and is responsible for monitoring asynchronous operations. It does this by creating a “zone” called ngZone, which intercepts events like clicks, inputs, and server responses, notifying Angular when it’s time to execute the change detection cycle.
Phases of Change Detection
At a high level, the change detection process follows a few key phases:
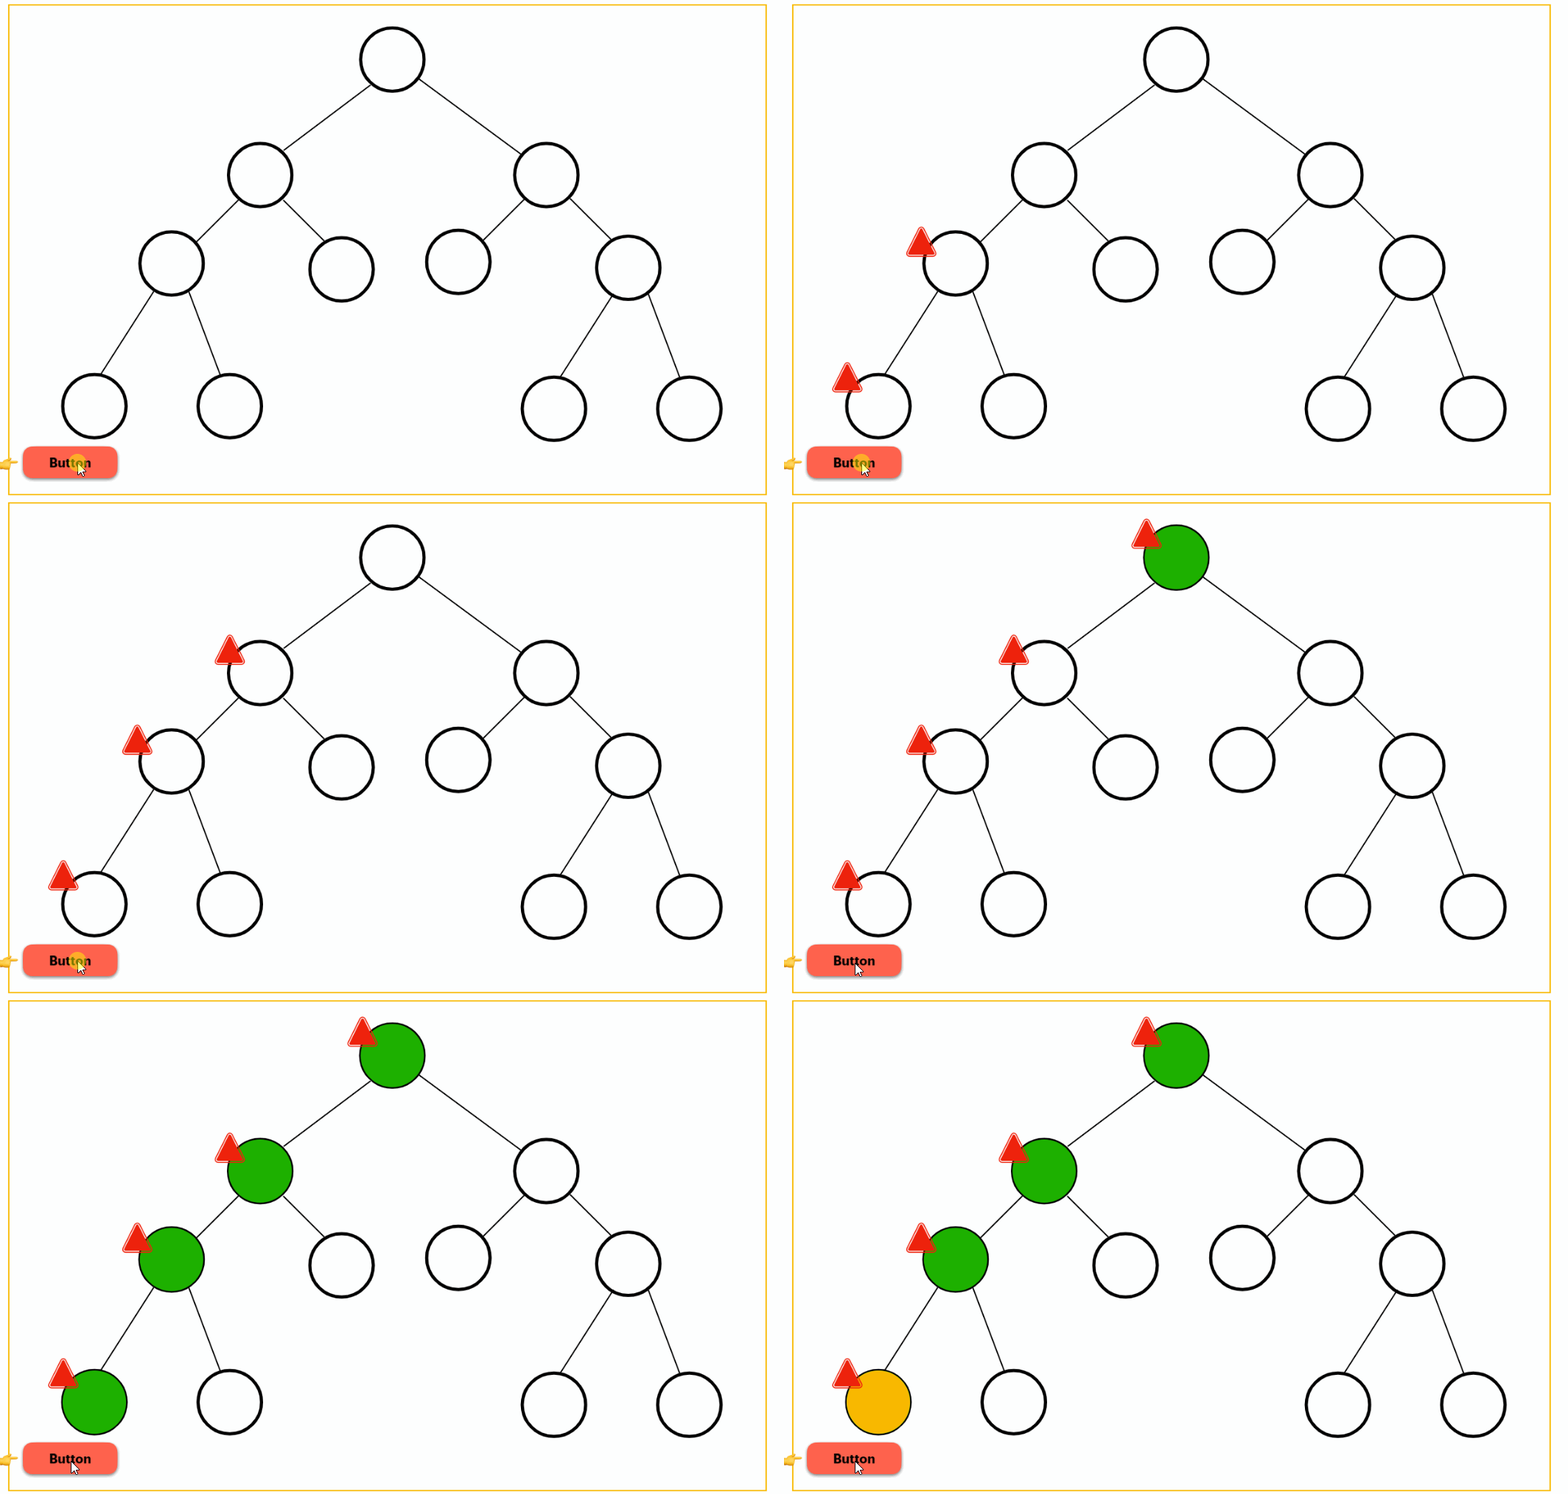
- Triggering Change Detection: ngZone detects an event and triggers change detection.
- Dirty Marking: ngZone marks the component where the event originated and all of its ancestors as "dirty".
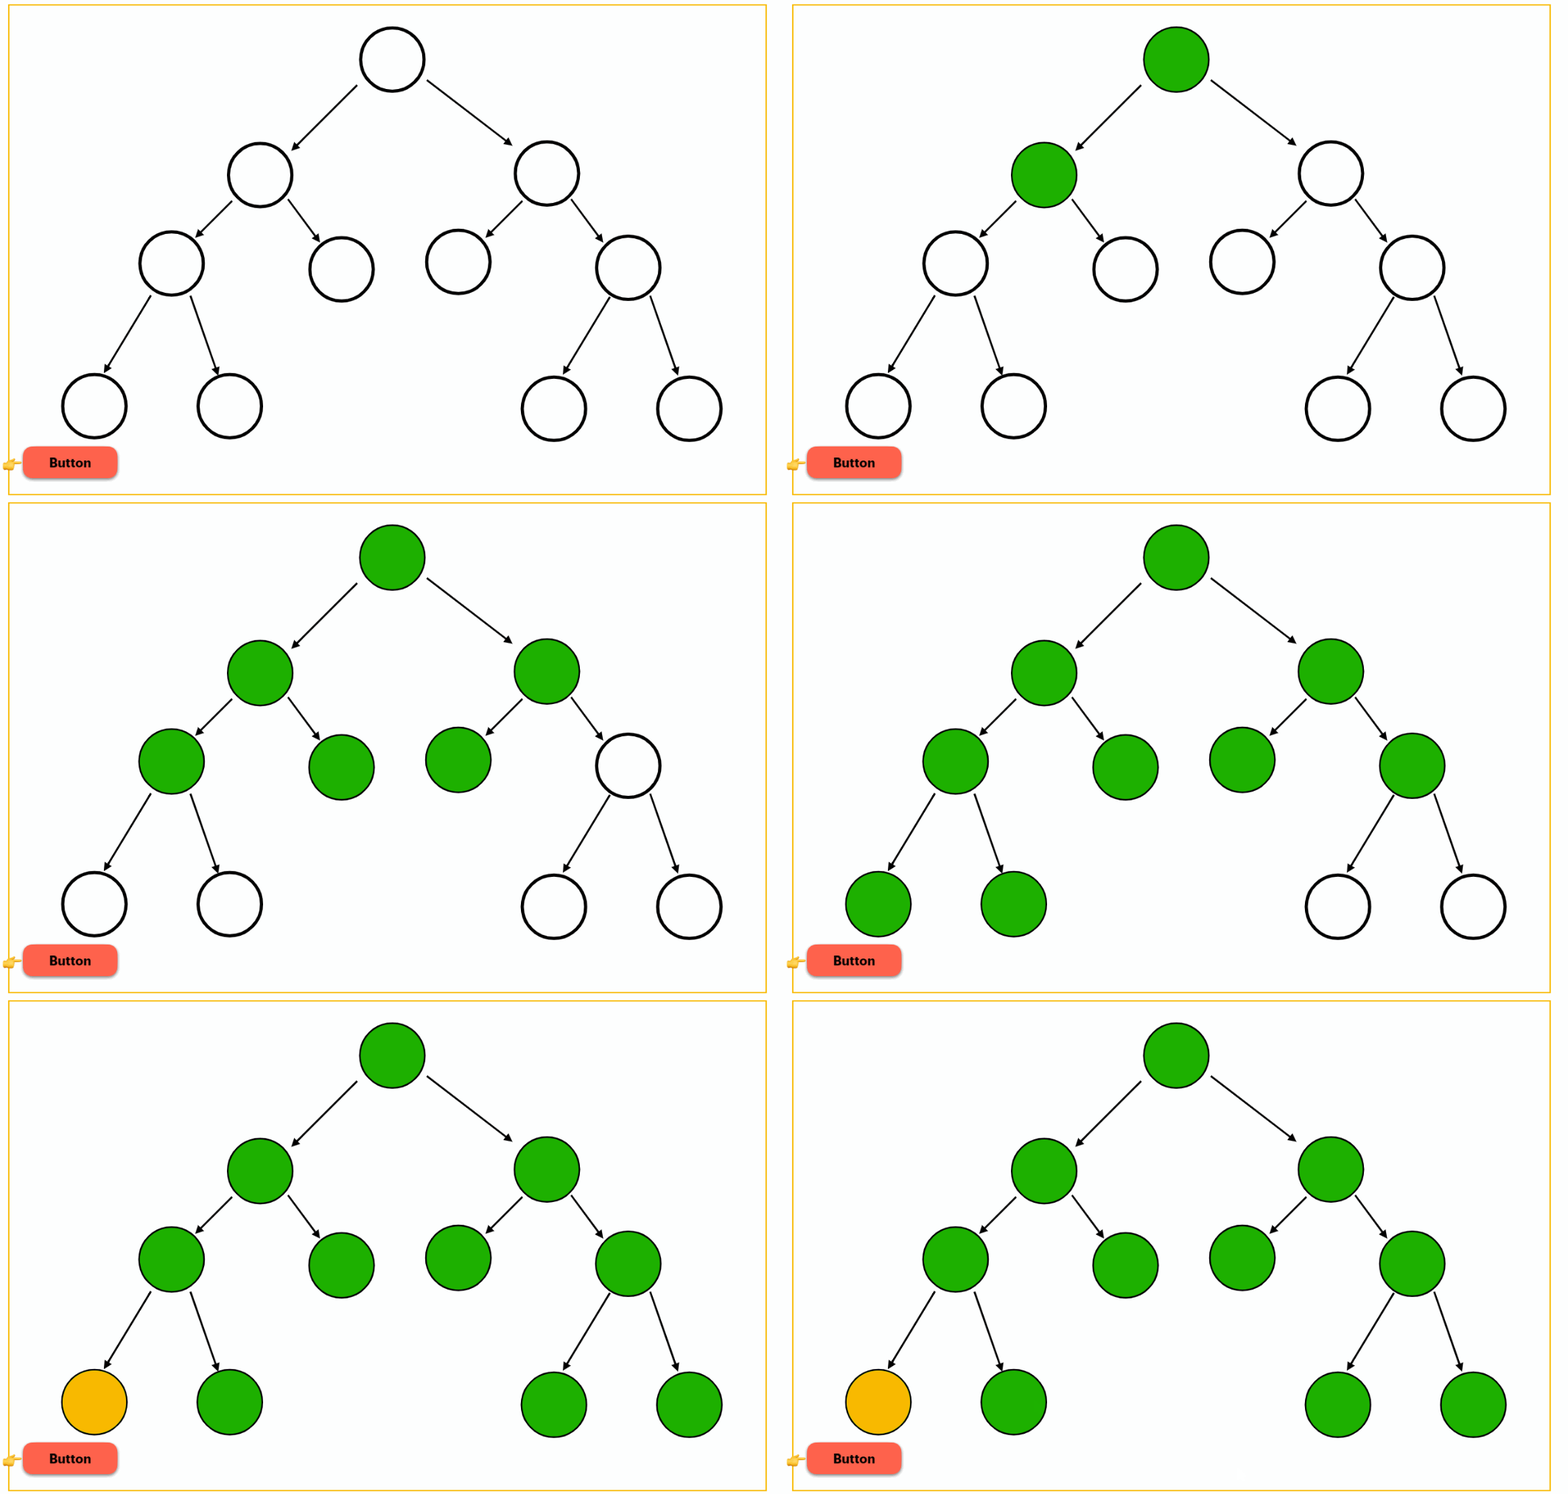
- Component Traversal: Angular checks each component in the app from top to bottom.
- DOM Update: If there are changes, the DOM is updated.
Dirty Marking
When an event occurs, Angular marks the component and all its ancestors as “dirty.” Then, it starts the change detection cycle from the root, passing through all components (dirty and non-dirty) to verify if anything has changed.
But why does Angular check all components? 🤔? Why not just the dirty ones? 🤔?
This depends on the change detection strategy.

Change Detection Strategies
Angular provides two main strategies for handling change detection:
- Default Strategy (the default for every component).
- OnPush Strategy
Let’s try changing the change detection strategy to OnPush:
  @Component({
      // ...
      changeDetection: ChangeDetectionStrategy.OnPush
  })
When we use the OnPush strategy, Angular will only run Change Detection for a component that has been marked as dirty, avoiding unnecessary checks on those that aren’t.
Change detection will now only execute when an input’s value changes or when an event is triggered within that component or one of its nested components.

OnPush e Signals
Angular is constantly evolving and is gradually introducing the concept of Signals.
Signals in Angular are a new reactive API introduced to simplify state management and improve app performance. Unlike RxJS Observables, which require manual subscriptions and explicit management, Signals work like reactive variables and automatically track dependencies.
When a Signal changes, Angular automatically detects the update and reflects it in the DOM only where necessary, optimizing the change detection cycle. In practice:
When a component uses a Signal, Angular automatically “tracks” these dependencies. If the Signal’s value changes, Angular performs change detection only for components that depend on that Signal. Therefore, Signals don’t require checking the entire component tree.
Zoneless
In the future, we may be able to do without Zone.js, relying solely on Signals to update components. But be careful: all components must use them; otherwise, we’ll still need Zone.js.
However, we can already experiment with removing Zone.js from our project by using an experimental feature; here’s how:
- Remove the entry "zone.js" from the polyfills array in angular.json
     "architect": {
      "build": {
        //..
        "options": {
          //..
          "polyfills": [
            "zone.js" // remove this entry
          ],
- Add provideExperimentalZonelessChangeDetection() to the providers array in main.ts
  bootstrapApplication(AppComponent, {
    providers: [
      provideExperimentalZonelessChangeDetection(),
    ],
  }).catch((err) => console.error(err));
Warning: This method, as the name suggests, is still experimental.
- Restart the application.
And that’s it! Now we have an application that doesn’t depend on Zone.js for Change Detection.
Let’s review some best practices to improve app performance:
Best Practices
- Use OnPush whenever possible to reduce the number of change detection checks.
- Minimize operations within the change detection cycle that could slow down the process.
- Use the async pipe in templates to manage Observables.
- Use NgZone.runOutsideAngular() to instruct Zone.js to ignore that code block and not rerun change detection.
Conclusion
Change detection is a fundamental concept in Angular. Understanding how it works and how to optimize it can significantly impact your app’s performance. Remember to consider change detection strategies and manual control to enhance the user experience. If you’re curious to learn more, I recommend checking out Angular’s official documentation and online resources.

Comments